Yes, this is certainly true! Do you want to know how? I’d be happy to share it with you!
With your image open in Photoshop, right click on your background image to create a duplicate layer. This will prompt a menu to open. From here, choose Duplicate Layer. Let’s name it Sharpen.
Now locate your menu bar at the top of the page and go to Filter/ Sharpen / Unsharp Mask. Don’t be fooled by the name!
Once you choose this, the following box will appear. I encourage you to play with these sliders to familiarize yourself with it’s various effects. For this photo, I decided to adjust the Amount to 38%, the radius to 105.5 Pixels, and Threshold to 17 levels. I recommend over sharpening as you will be able to decrease the effect later. I like to keep my preview button checked to see the overall effect on my image in the background. Once you hit OK, this would have sharpened your entire image.
Now add a layer mask to the sharpening layer we just created. To do this, go to your menu bar at the top of your page and choose Layer / Layer Mask / Hide All. This will create a black mask over your image so you shouldn’t see the sharpening effect anymore.
The screen shot below will show you how the mask will look.
To reveal the sharpening in specific areas of your image (e.g. the eyes, nose, mouth) just use your Brush Tool in white to reveal the sharpening. Remember, a white brush will reveal the effect you added and the black brush will conceal it!
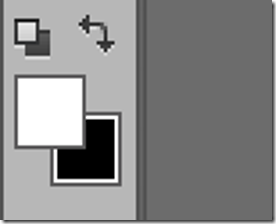
To be sure you have a white brush, the box in the front should be white.
If not, just click the arrows and this will switch the colors around.
Remember you can play with the brush opacity at the top of your page right under your menu bar. I usually keep mine at around 40 – 50%. In this particular example, however, I kept it on 100%.
Once you’ve painted in your sharpening (revealed your sharpening effect), you can now adjust the opacity of the mask by using the slider.
If you revealed too much, you can always change the color of your brush to black and conceal the effect again! No problem!
If for some reason it is not working, you may want to check that you are painting on your layer mask and not the actual picture. You can confirm this by looking at your black layer mask. If where you painted is turning your black layer mask gray/white, than you are on the mask and doing it correctly.
Now for the before and after. Oh, and just so you know, I only sharpened the eyes, nose, and mouth area.
BEFORE (without sharpening) is on left and AFTER (with sharpening) is on right.
And larger so you can really see…
Hope you enjoyed this little tutorial. Remember, if you have any questions, you know where I am!


Ah perfect - I did not know how to create a reverse mask like that (or whatever it's called) - that is very helpful! And I never really knew what to do with unsharp mask - it never seemed right to me - so I will need to try it this way now!! thanks!! :)
ReplyDeleteYou can also use the "\" key to see the painted areas (It will show in light red) and then hit it again to turn it off. I saw that tip in a PS class I took last year and was thinking "Wow genius"
And now that I know what to do with unsharp mask - I am thinking "Wow genius" again!! :)
Thanks for the tip! Good to know! Beautiful photo, too :-)
ReplyDeleteThanks for the great tips! Layers are amazing!
ReplyDeleteAwww...she looks so sweet!! Great shots.
ReplyDeleteweb hosting
business web hosting
affordable web hoting
website hosting